Hardware Default Settings
Hardware Default Settings
Starting in Q1 2019, Synapse began manufacturing and programming all of our hardware devices with a new default configuration. The changes are to the default network channel and CRC settings.
- Legacy Default - Channel 1 with CRC disabled
- New Default - Channel 9 with CRC enabled
For information about this hardware default change please review the Product Change Notices.
Best Practices
Current Product Status
Product Name | New Defaults in this Revision number or higher | Date of Change |
|---|---|---|
AIM-121 | E0 | September 5, 2019 |
Central Base Station | C0 | May 14, 2019 |
DIM10-087-04 | ||
DIM10-087-06 | ||
DIM10-087-06-A | D0 | April 10, 2020 |
DIM10-087-06-F | ||
DIM10-087-06-FW | C0 | January 24, 2020 |
DIM10-250 | F0 | April 22, 2020 |
DIM10-281 | ||
DIM10-283 | ||
SS450 | C0 | May 14, 2019 |
TL7-B2 | B0 | February 15, 2019 |
WSW-02 | C0 | September 30, 2019 |
WSW-08 | C0 | September 30, 2019 |
Note: If no revision number or date is listed, the legacy defaults are still shipping.
QR Code - change
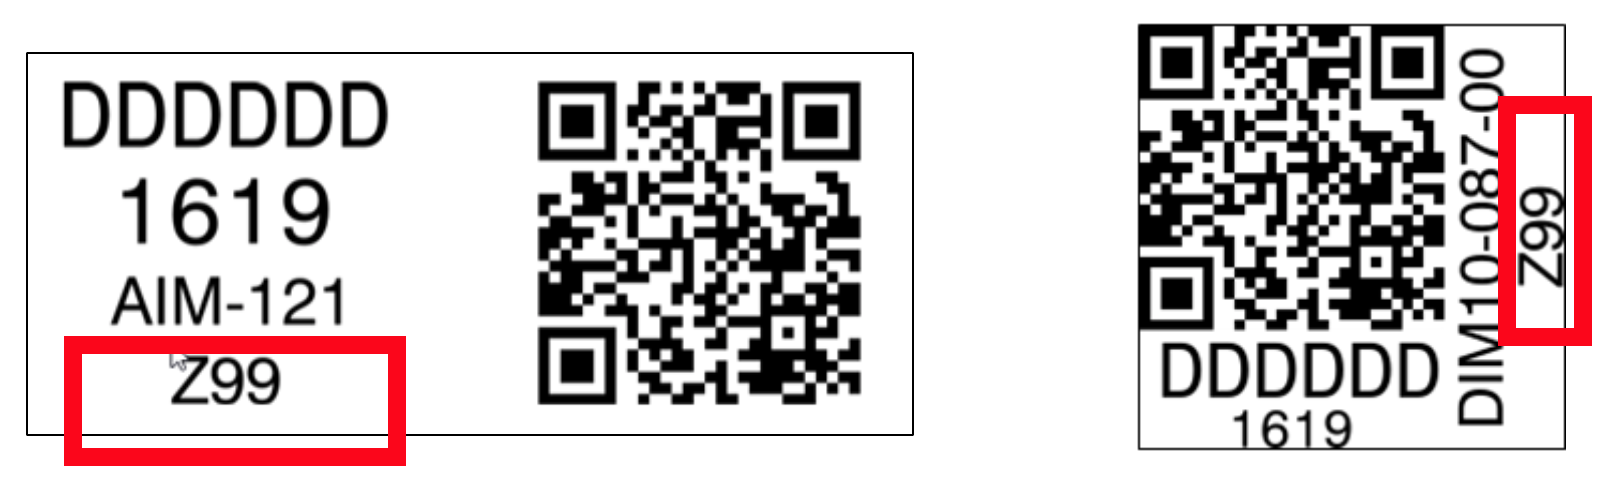
The hardware revision information has been added to the QR code. The Revision number is found under the hardware model number at the bottom on the larger labels and on the far right of the smaller labels. In the examples below, the revision numbers are shown as "Z99".
If you are currently scanning the QR code for End of Line testing, you may need to update the QR code data to accommodate the additional hardware revision information.
OEM partners
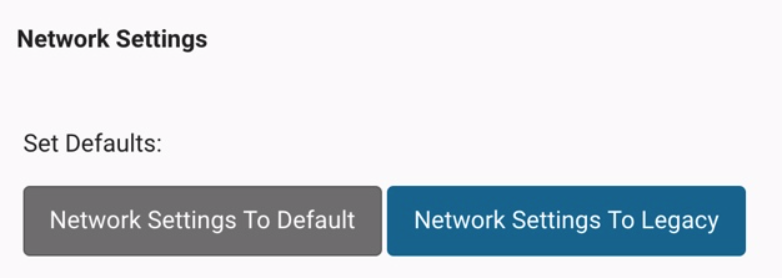
OEM partners will be informed when their new orders will start shipping with the new defaults. OEM Partners with End of Line testing procedures will need to make changes to their gateway network settings to the new default settings for testing with new controllers. This can be done by going to the main web interface of the SS420/450 and clicking on the "Config" option on the main menu on the left and then scrolling down to the Network Settings section.
There is an option available to make it easy to switch between the legacy default settings and the new default settings in the web interface.
Refer to the "New Installations" instructions listed below for more details on switching between these two different network default setting.
New Installations
New installations that include a mixture of hardware devices will need to run the Census feature twice to discover and add devices with both default settings.
- Channel 1 with CRC disabled (Legacy Default)
- Channel 9 with CRC enabled (New Default)
There is an option available to make it easy to switch between the legacy default settings and the new default settings in the web interface of the SS450 gateway. This can be done by going to the main web interface of the SS450 and clicking on the "Config" option on the main menu on the left and then scrolling down to the Network Settings section.
Below are the steps to take if your new installation includes hardware devices with mixed defaults.
Legacy Default Settings
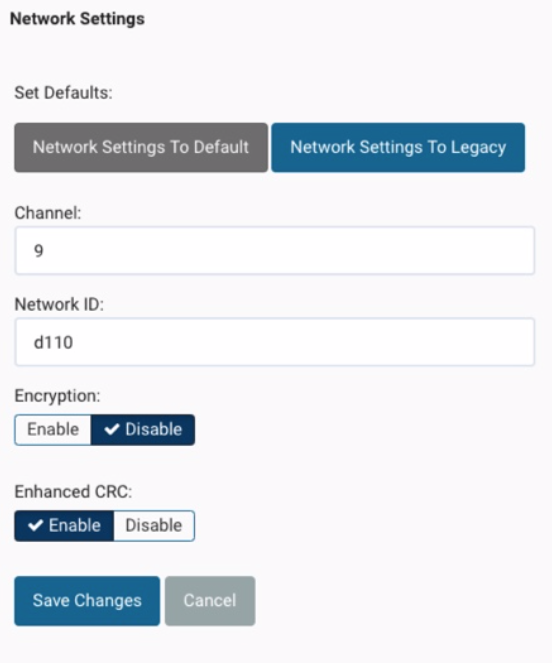
- Change the network settings on the SS450 to the "Legacy" and the old default appear. (channel 1, network id D110, encryption disabled, CRC disabled)
- Save changes
- Go to Devices on the main menu and select Census to find devices with these settings.
New Default Settings
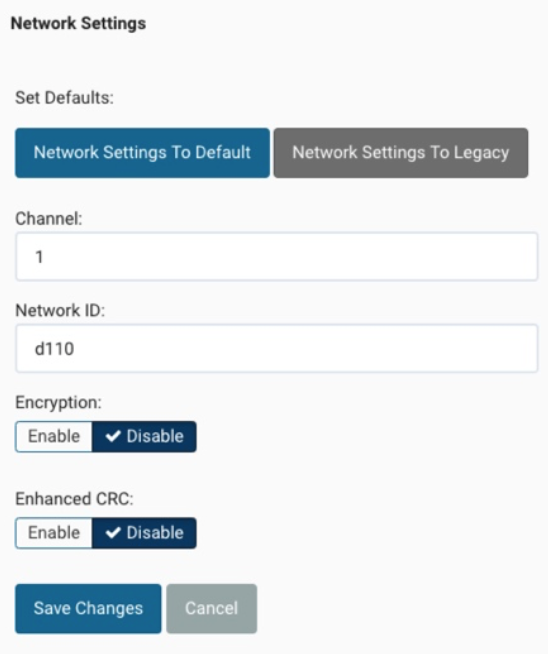
- Change the network settings on the SS450 to "Default" the new default settings appear. (channel 9, network id D110, encryption disabled, CRC enabled)
- Save changes
- Go to Devices on the main menu and select Census to find devices with these settings.
- Repeat steps 1-6 until all hardware devices are found.
Existing Installations adding new hardware devices
Existing customers will not be affected unless they are adding new Synapse hardware to their installation. Current installation using the legacy defaults or custom network settings will need to change their SS450 gateway to the new default settings to discover and add the new hardware devices to their system.
There is an option available to make it easy to switch between the legacy default settings and the new default settings in the web interface. To change the network settings to the new default, go to the main menu and click on the "Config" option on the left side and then scroll down to the Network Settings section.
- Select the "Network Settings to Default" button to change the network settings to the new default settings and then click "Save Changes".
- Once the changes are saved, the network settings of the SS450 will match the settings for any new hardware that is configured with the new default settings.
- Go to Devices on the main menu and select Census to find devices with these settings.
- Once all the new hardware devices are added to the system, customers can change any custom settings and then save their changes.
Contact our Solutions Engineering team if you have questions or need assistance with issues related to this change.